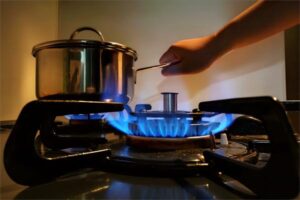
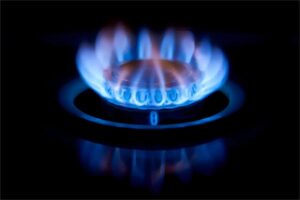
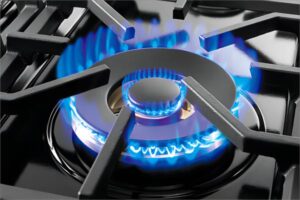
 Replacing a stove top burner may be a difficult process, but with the correct equipment and a step-by-step approach, it can be a do-it-yourself effort. Over time, stove top burners can wear out or get damaged, and understanding how to replace them can help you save money on maintenance charges. in this article. We’ll lead you through the steps of changing a stove top burner
Tools and Materials You’ll Need:
Before you begin, gather the following tools and materials:
- Replacement Burner:Ensure you have the appropriate replacement burner for your stove. For further information, consult the user handbook for your stove or the manufacturer’s website.
- Screwdriver:Depending on the style of your stove, you’ll need a Phillips or flathead screwdriver.
- Wrench:Some stoves may require a wrench to remove the burner element.
- Safety Gear:Protect yourself during the procedure by using safety goggles and gloves.
- Power Source Disconnection:To avoid electrical mishaps, ensure your stove is unplugged or the circuit breaker is switched off.
Step-by-Step Guide:
Safety First:
Make sure your stove is completely unplugged from the power source. To avoid electrical mishaps, unplug it from the wall or switch off the circuit breaker dedicated to the stove.
Access the Burner Element:
Remove the top panel of the stove. This could involve removing burners, grates, and other burner-covering components. These parts are usually removed by pulling them out.
Identify the Burner:
Locate the burner element that has to be replaced. It is usually attached to the stove with two or more screws or bolts.
Disconnect the Wiring:
Before removing the burner, disconnect any wire. Make a point of identifying and marking the wires so that you can rejoin them appropriately afterwards. Pull the wires gently apart, or use a screwdriver to release them if they are fastened with screws.
Remove the Fasteners:
Remove the screws or bolts holding the burner in place with the proper tool (screwdriver or wrench). Keep these fasteners; you’ll need them to install the new burner.
Take Out the Old Burner:
Remove the old burner element from the stove with care. Be cautious since it may still be hot if you recently cooked. Set it aside for now.
Prepare the New Burner:
Unbox the replacement burner and check that it is the same size and shape as the previous one. Make sure the wiring connection points are the same.
Connect the Wiring:
Replug the wires into the new burner element. As previously said, connect the wires to the proper terminals.
Secure the New Burner:
Install the new burner in the same spot as the old one was removed. Use the saved screws or bolts to connect it to the stove securely. Tighten them snugly but not too tightly since this might harm the burner.
Reassemble the Stove:
Replace any components that were removed to get access to the burner, such as the burners, grates, and top panel. Check that everything is correctly reinstalled.
Power On and Test:
Reconnect the power supply by plugging the stove back in or resetting the circuit breaker. Turn on the replacement burner and make sure it warms up properly.
Final Checks:
Allow the burner to achieve the proper temperature for a few minutes. Check for any problems with the connection or heating performance. Check for any loose components or fasteners as well.
Additional Tips:
- While this guide covers the general steps, it’s crucial to consult your specific stove’s user manual for any manufacturer-specific instructions or safety precautions.
- If you encounter any difficulties, or if you’re not comfortable with electrical work, it’s advisable to seek the assistance of a qualified technician or an appliance repair professional.
- Always prioritize safety. Ensure the stove is disconnected from the power source before starting the replacement process.
- If you’re unsure about any step in this process, don’t hesitate to reach out to a professional for assistance. Incorrect installation can lead to safety hazards or damage to your stove.
Potential Challenges and Complex Replacements:
Some burner replacements, particularly on smoothtop radiant stoves, can be complicated and may need expert help. These stoves frequently have sealed, glass-ceramic cooktops that make accessing and replacing the heating components difficult for the typical homeowner. Without the proper skills, attempting to repair these burners might result in damage to the cooktop or other components.
It is best to call the manufacturer’s service department or a skilled appliance repair expert in such circumstances. They have the knowledge and skills needed for difficult replacements and can guarantee that the new burner is properly installed.
Conclusion
Replacing a stove top burner is a do-it-yourself project for individuals with technical knowledge. You may effectively replace a burner and extend the life of your stove by following this advice and taking the required safety precautions.
ODM service
Looking for reliable camping stove supplier? At Deermaple, we specialize in ODM service, offering high-quality and innovative stoves tailored to your needs.
If you are interested in camping stove wholesale , please contact us.