 Long camping journeys require repackaging your food into freezer bags to save space and weight. However, after you’ve repackaged your food, there’s no way to “cook” it after adding hot water. This is especially difficult at the end of a hard day of hiking when you’re starving and can only wait 5 of the 20 minutes it takes to boil the food. You’re stuck eating tough foods.
These DIY cozies can help rehydrate your meals and keep them warm after they’ve been cooked. They are inexpensive, simple to make, fit neatly into a freezer bag, and can be reused for each meal. In this article, we’ll go over the numerous benefits of a cozy, the materials required to construct one, and step-by-step instructions for making your own pot cozy or insulated meal pouch!
What Can I Make Cozy For?
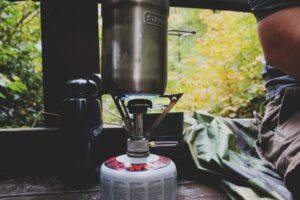
Most hiking pots are composed of thin, highly heat-conductive materials such as aluminum or titanium.
This makes them good at transporting heat from your stove to the water within, but the energy transfer also works in the opposite direction. If it’s chilly or windy outside, the pot will cool quickly and evenly, and so will the food inside. Placing a pot in a cozy creates an insulating layer that slows down the process. A cozy is also useful for hiking dinners that require only water. Placing your boil-in-bag meal inside an insulated cook pouch will keep the heat inside. This will reduce the cook time and keep your meal warmer for much longer.
When Should You Use a Cozy?
While an insulated cozy is handy at any time of year, it is most effective when it is really cold outdoors, such as during the cooler shoulder seasons, at high altitude, or in winds.
An insulated cozy is useful for anything that may drain heat energy from your pot. Even in the summer, it can be quite chilly in the mornings.
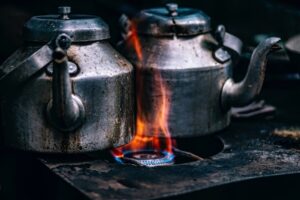
How Does This Save Fuel?
Many homemade dehydrated meals need to be cooked for 10 to 15 minutes. Maintaining a simmer to cook for so long might use a lot of fuel, especially if it’s windy outside.
The insulated cozy retains heat so well that you may skip the simmering process entirely. Simply add the dehydrated meal to the boiling water and set the pot inside the cozy. The passive heat energy stored inside will be sufficient to completely rehydrate the food.
Pros Of Using an Insulated Cozy
- Using an insulated cozy simplifies cooking by allowing for a boil-and-soak approach rather than simmering. Homemade dehydrated hiking meals may now be rehydrated exactly like store-bought meals!
- The boil & soak method saves fuel and decreases cooking time significantly. Simply add ingredients to boiling water and place the pot inside the cozy.
- Because all you need to do is boil water, you may choose a simpler and less costly camping burner (one without complex simmer control). All it needs to do is boil water effectively.
- Eat your meal directly from the pot when it’s ready. The cozy makes even the hottest metal pot safe to handle with your bare hands.
- Food will stay warm for longer. So now you can sit back, relax, and enjoy your food. There’s no urgency to scarf it down before it gets cold.
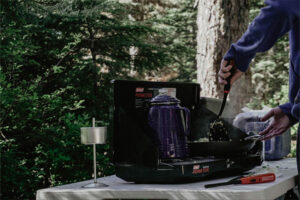
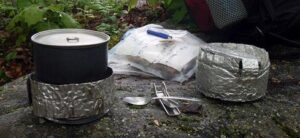
How to make a pot cozy for backpacking?
Step 1: Assemble Items
You’ll need the following:
- Windshield sunshade
- Cook pot
- Scissors
- Marker
- Measuring tape
- Large needle and strong thread
- Velcro
Step 2: Measure Shade
The design features two overlapping flaps to insulate the top of the pot, but only one flap for the bottom, making it simple to put cozy over a hot pot.
Measure Cozy Length:
Wrap the shade around the pot’s perimeter, allowing one inch of overlap for the Velcro clasp, and mark with pen.
Measure Cozy Height:
Lay the shade flat and measure the width required to cover the top, sides, and bottom, plus an allowance for folds. For example, if your pot has a diameter of 7″ and a height of 5″, the sum of 19″ plus 1″ for allowance is 20″.
You want it snug but not too tight since you’ll need to slip it over the pot once you’ve taken it from the fire.
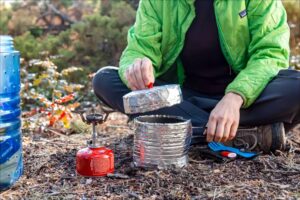
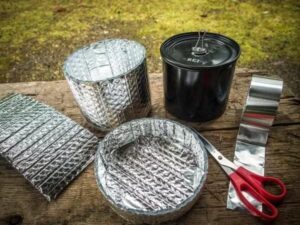
Step 3: Cut Shade
- Use a pot lid to define the contour of each flap. Two opposing flaps on top and one on the bottom (it makes no difference where you place the bottom flap).
- The picture depicts a single bottom flap and two rounded top flaps.
- Before cutting, wrap it like a gift to ensure it fits over the pot.
- Cut your shade.
Step 4: Sew Velcro Closures
- My shade was silver on one side and purple on the other, therefore I picked silver for the interior.
- Add velcro to the inner and outside edges of the side seams.
- Sew a 1-2″ velcro strip inside one top flap and an equal length on the opposing side top flap. (See picture)
How to use your pot cozy for cooking
There are two ways you can use your pot cozy when cooking meals on the trail:
Cooking Method #1 –
Boil water in your cook pot, add dry food, boil for a minute or two (if necessary), then remove from heat and set in your pot cozy for 15 minutes. Your food will continue to “cook” as you set up camp (or wait impatiently). When you’re finished, you’ll have a hot lunch ready.
Cooking Method #2 –
This is referred to as “freezer bag cooking”. Boil water in your cook pot, then pour it into a frozen Ziploc bag with dry food, close the bag, and place it back into the empty pot (remove from heat), and lastly place the pot (with baggy and food inside) in your pot cozy and let it set for 15 minutes.
You may eat your meal straight from the baggy (which is kept within the pot cozy so you don’t burn yourself), and you won’t have to clean the pot afterward. This approach works well with soft meals like mashed potatoes, spaghetti, and couscous. Not very good for difficult grains that require long-term boiling or rehydration, such as rice).