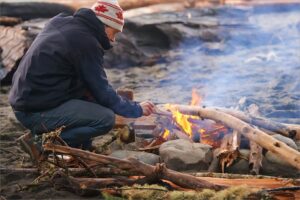
 Rain happens, and it soaks firewood, making it moist, soggy, and difficult to light. When camping, even pre-bundled firewood from the camp shop may be damp, so you’ll need to know how to get it to burn. With the proper build, sufficient of tinder and kindling, and potentially some assistance from a chemical fire starter, you may ignite an effective campfire even in the worst conditions.
Type of materials you would need
Tinder: Use a Firestarter stick, cotton balls, dryer lint, twisted paper, dry wood shavings, or wet fire tinder. To make cotton balls or lint burn longer, add a little amount of cooking oil or petroleum jelly.
Kindling: Find little, dry twigs that are less than a finger thick and four to six inches long. Shave damp twigs down to the dry core using a knife.
Fire Lighters: Prepare ahead of time by packing fire lighters. These are items made up of a liquid hydrocarbon and lignite. The liquid hydrocarbon is often kerosene. The lignite component increases the bum time and lowers the flame height, resulting in higher combustion efficiency.
Wood: It’s acceptable if the wood you obtained is a little wet in certain spots since the heat from the fire absorbs tiny quantities of moisture rapidly. However, do not include any green wood (freshly cut wood from a living tree), since it will create a lot of smoke and provide no benefit.
Step 1. Collect both small twigs and larger logs for the fire
The first step is to acquire a big amount of wood, which can range from little twigs to huge logs. Finding enough of dead twigs and little branches is essential. These are finest snapped from dead trees, either fallen or standing. You’re searching for branches that create a loud cracking sound when snapped, which indicates they’re certainly dead.
Then gather larger pieces of wood and logs, avoiding anything that has been on the ground for an extended period of time because it will be the most saturated and may contain many creepy crawlies.
Step 2. Make some dry kindling
Divide a huge log into quarters using an axe or hatchet. The interior of bigger logs will be the driest wood. Then, using a hatchet or knife, shave the dry wood to make some kindling. Snap all of the little twigs and arrange them in a mound near to where the fire will be formed.
Step 3. Use logs or rocks to build a platform
Build a platform for your fire using huge logs or even rocks. This will keep it out of the water, allow for air movement, and eventually burn the wood below if you use logs
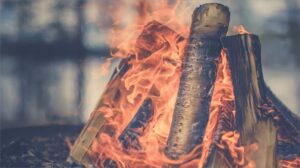
Step 4. Build your fire in a teepee shape
form your fire into a teepee form with thin twigs and branches, then place the kindling beneath. This also improves airflow, dries more pieces of wood while burning, and helps your fire start faster. You can also opt to put down one giant wood, lean the rest against it, and start your fire beneath. This will help to sustain your fire and dry big amounts of wood rapidly.
Step 5. Light your kindling to start the fire
You’re now ready to fire your kindling. If you have any paper, fabric, or other material to assist start your fire, put it in with your kindling right now. Use a lighter or matches to ignite the dry kindling or paper. You might need to gently blow on the fire to encourage it along. Once lit, the kindling will burn, dry, and catch on the little twigs you’ve put on top.
A few extra materials you can keep on hand to get your fire started are:
- Flavoured corn chips
- Dry spaghetti
- Steel wool
- Cloth or clothing
- Paper or toilet paper
- Or, best of all some sort of fuel-based fire-lighters that can be purchased from most camping shops
Step 6. Add wood carefully, working up by size
As important as it is to start your fire, it is also essential for extinguish it before leaving. You can accomplish this by putting out the fire with water or, as a last resort, burying it with earth or sand. Burying the fire is not a favoured way since the next individuals who come along may burn themselves, thus it should be clearly indicated to avoid anyone being injured.
Step 7. Don’t forget – put out the fire!
As crucial as it is to start your fire, it is also critical to extinguish it before leaving. You can accomplish this by putting out the fire with water or, as a last resort, burying it with earth or sand. Burying the fire is not a favoured way since the next individuals who come along may burn themselves, thus it should be clearly indicated to avoid anyone being injured.
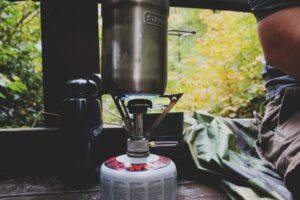
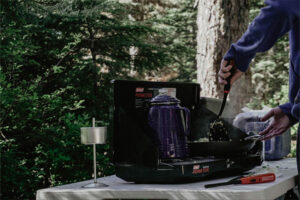
Keep in mind when planning a camping, fishing or hiking trip into the great unknown that although Mother Nature is a beautiful thing, she can also be nasty as well. So, it’s important to pack for all conditions, prepare for the worst, and don’t let your weekend trip turn into a survival situation. To be prepared for the worst, have a few additional supplies in your pack, such as an emergency blanket, a small portable gas burner, and thermals to keep you warm.

Final Thoughts
When planning a camping, fishing, or hiking trip into the great unknown, keep in mind that while Mother Nature is a beautiful thing, she can also be nasty. So, it’s important to pack for all conditions, prepare for the worst, and don’t let your weekend trip turn into a survival situation. A few extra items in your kit, such as an emergency blanket, a small portable gas stove, and thermals to keep you warm to be