 Have you ever found yourself staring at a cold camp meal, stomach rumbling like a bear after lights-out? We’ve all been there, wishing for a magic wand to conjure up hot food, right? But fear not, fellow adventurer! Lighting your backpacking stove doesn’t have to be a frustration. In fact, with just six simple steps, you can go from a hangry newbie to a campfire chef in no time. We’re talking about straightforward, clear instructions that’ll have that pot bubbling before you can say “s’mores.”
So, ready to trade hangry for happiness? Let us get cooking and light the stove!
How Light Should a Backpacking Stove Be?
The weight of your backpacking stove is a critical consideration for outdoor enthusiasts. Here are some tips on finding the right balance between weight and functionality:
Evaluate your needs
Consider the type of cooking you’ll be doing and the duration of your trips. Opt for a lightweight stove that meets your specific requirements.
Material Matters
Choose a stove made from lightweight materials like titanium or aluminum. These materials maintain durability while reducing overall weight.
Compact Design
Look for stoves with a foldable or compact design. This ensures easy packing and minimal space usage in your backpack.
Fuel Efficiency
Select a stove that maximizes fuel efficiency, allowing you to carry less fuel without compromising your cooking capabilities.
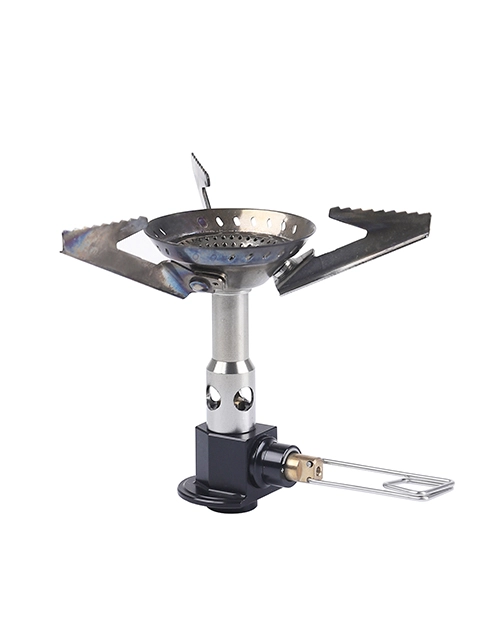
How to Light a Backpacking Stove
Whether you’re using a propane stove or a portable backpacking stove, the basic principles remain the same. Here’s a step-by-step guide to lighting your camping stove:
1. Choose a Safe Location
Find a flat, stable surface away from flammable materials like tents, grass, or dry leaves. Wind can disrupt the flame, so choose a sheltered area if possible.
2. Gather Your Tools
Ensure you have your chosen lighting method (built-in igniter, lighter, matches), a pot or cooking vessel, and any optional accessories like a windscreen or heat pad.
3. Inspect the Stove
Make sure the burner head and fuel line are clean and free of debris. Check for any leaks or damage to the canister or fuel bottle.
4. Lighting the Stove
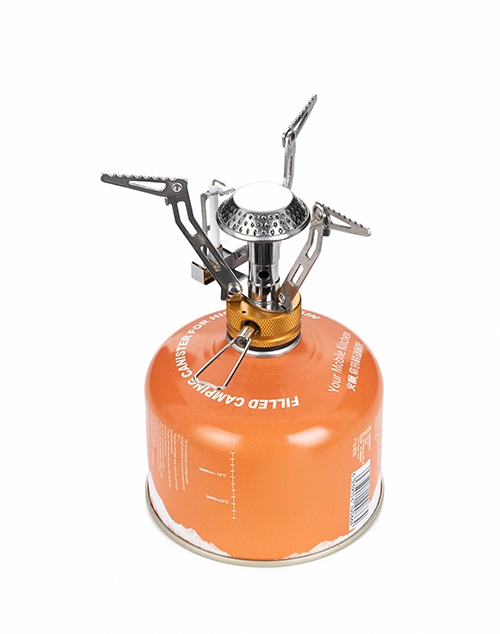
Attach the canister
Screw the canister firmly onto the stove’s threads. Ensure a snug fit without overtightening. Some stoves have a locking mechanism you may need to engage.
Open the fuel valve slightly
Turn the knob counter-clockwise just enough to release a small amount of gas. You should hear a faint hissing sound. Avoid opening the valve fully, as this can create a dangerous burst of flame.
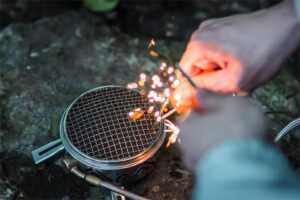
Light the stove
This depends on your lighting method:
Built-in igniter: If your stove has a built-in igniter, press the button repeatedly until the flame ignites near the burner head.
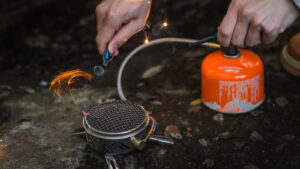
Lighter: Hold the lighter at a safe distance from the burner head and flick it to create a spark. Immediately direct the flame towards the burner to ignite the gas.
Matches: Light a match and carefully hold it near the burner head to ignite the gas. Keep your hands and face well away from the object.
5. Adjust the Flame
Once lit, slowly turn the fuel valve knob further to increase the flame size and intensity. Ideally, the flame should be blue with minimal yellow flickering. Adjust to your desired cooking heat level.
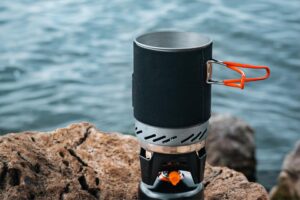
6. Get Cooking!
Place your pot or cooking vessel on the burner and start preparing your meal. Remember to keep an eye on your food and adjust the flame as needed.
Safety Tips
- Safety first!Before leaving the area, always put out the flame. Never leave a burning stove unattended.
- Always read the manufacturer’s instructions for your specific stove model.
- Do not ignite the stove indoors or in a confined space.
- Make sure the burner head is clear of debris before lighting.
- Never leave a lit stove unattended.
- Before putting the stove away, let it cool fully.
Additional Tips
Windscreen: To prevent being disrupted by wind, use the provided windshields to protect the flame This will ensure even heat distribution and prevent potential flare-ups.
Fuel level: Be aware of your fuel level and plan accordingly. Running out of fuel mid-meal can be inconvenient, so pack extra canisters based on your planned cooking needs.
Cleaning: Regularly clean your stove to prevent clogs and maintain optimal performance. To find out how to clean your stove specifically, refer to the manual.
Difference between Lighting a Backpacking Stove V/S Propane Stove
| Aspect | Backpacking Stove | Propane Stove |
| Fuel Type | Typically uses liquid fuel (e.g., white gas, isobutane) | Uses propane gas in a compressed form (in canisters) |
| Setup and Assembly | Compact and designed for easy setup on a stable surface | May have more components, but still relatively simple |
| Connection to Fuel Source | Connects to a fuel canister or liquid fuel bottle | Connects to a propane canister |
| Valve Operation | Manual valve adjustment on the stove | Turn on/off valve on the propane canister |
| Ignition Method | May require a lighter, matches, or built-in igniter | Often equipped with a built-in igniter or requires matches or a lighter |
| Flame Adjustment | Adjusted manually using a control valve on the stove | Adjusted using a control knob on the stove |
| Common Fuel Types | Isobutane, white gas, alcohol, or similar liquid fuels | Propane gas in compressed form |
| Weight and Portability | Lightweight and designed for easy transport | Can be bulkier but still portable depending on the model |
| Outdoor Conditions Suitability | Generally suitable for various outdoor conditions | May be affected by extreme cold, affecting gas pressure |
| Common Applications | Ideal for backpacking, hiking, and minimalist camping | Suitable for car camping, RV trips, and general outdoor cooking |
Addressing User Queries
How do you ignite a backpacking stove?
The way you ignite a backpacking stove depends on its type and ignition system. Here’s a breakdown of the two most common types:
· Canister Stoves
First set up the stove on a stable surface.
Piezo igniter: Most canister stoves have a built-in piezo igniter. Simply open the gas valve slightly, press the igniter button, and hold it until the flame appears. Adjust the flame size with the valve knob after it’s lit.
Lighter: If your stove lacks a piezo igniter, use a lighter. Open the gas valve slightly, hold the lighter flame near the burner head, and turn the valve knob to ignite the gas. Adjust the flame size as needed.
· Liquid Fuel Stoves
Pump priming: Fill the fuel reservoir and pump the pressure knob to pressurize the fuel tank.
Open the valve slightly: Allow a small amount of fuel to flow onto the burner head.
Spark ignition: Use a lighter or flint and steel to create a spark near the burner head to ignite the fuel.
Adjust the flame size: Once the stove is lit, adjust the flame size with the valve knob.
How do you light a gas camping stove?
Lighting a gas camping stove involves connecting the fuel source, opening the valve, and using the built-in igniter or a lighter to ignite the gas. Adjust the flame as needed for cooking.
How do you start a portable stove?
Starting a portable stove is similar to other camping stoves. Connect the fuel source, open the valve, and use the stove’s igniter or a reliable lighter to light the flame. To cook adjust the flame.
Can you light a camp stove with a lighter?
Yes, you can use a lighter to ignite a camp stove. Hold the flame near the burner while turning on the gas to achieve a steady flame. Exercise caution and follow safety guidelines
ODM service
Looking for reliable camping stove supplier? At Deermaple, we specialize in ODM service, offering high-quality and innovative stoves tailored to your needs.
If you are interested in camping stove wholesale , please contact us.