 Installing a gas range is a simple task that requires just basic equipment and widely accessible supplies. You may also undertake the task yourself if you use the proper supplies and properly follow the instructions. A professional might charge several hundred dollars for a hook-up. When moving gas and electric stoves, it is strongly advised to have another person assist you. Consult a professional if you have any queries or concerns about gas connections. In this post, we will demonstrate how to hook up a gas stove:
Installing a gas range: step-by-step guide
Installing a gas range requires two people and a few tools, precautions, and installation instructions. As a general overview, use this eight-step guide. Allow four to six hours from start to finish for a gas range installation.
Refer to your appliance’s installation manual for precise instructions. If a gas line must be installed, get expert assistance.
Supplies
- Gas range flex connector (drying gas connector)
- ½ inch by ½ inch street elbow (pipe fitting)
- Teflon pipe-joint tape
- Gas leak detector
Tools
- Adjustable wrench
step 1: obtain the correct gas connector
If you’re upgrading an old gas stove, make sure you utilize a new gas range flex connector to avoid gas leaks.
- Your installation manual will specify the kind of gas hookup required for either “range” or “dryer.”
- These connections perform the same purpose, but the end fittings must be compatible with your appliance for correct stove installation.
- Check that the connector is long enough to connect the stove to the gas valve.
These connections are typically 12 inches in diameter. The particular type of gas connector you will require may be found in your owner’s handbook.
step 2: turn off the gas valve
Locate the gas valve and ensure it is off.
- In general, the shut-off valve should be adjusted slightly until it creates a 90-degree angle with the pipe itself.
- If you’re replacing an existing gas stove, make sure to gently unplug the device after you’ve shut off the gas.
Consult a professional if you need a shut-off valve installed or have questions regarding your gas connection.
step 3: wrap the gas valve threads
Tape the gas valve threads twice in a clockwise direction. To fulfill industry requirements, only tape manufactured only for gas connections should be used.
step 4: connect the gas tube
After wrapping the threads, connect the gas connection to the gas line.
- Remove the connecting fitting’s end cap.
- To avoid gas leaks, wrap the end with Teflon tape.
- Screw the connection into the gas line with care.
prevent kinks in the gas connector and prevent forcing the connector into the gas line.
step 5: connect the street elbow
Attach the street elbow to the range’s gas port by connecting the free end of the street elbow to the free end of the gas connector or tube, being careful not to overtighten. Wrap the fittings with tape after that.
step 6: tighten the gas connector nuts
Tighten the nuts on both sides of the gas connector to the connector fittings.
step 7: check for gas leaks
Turn on the gas and spray the connector junction with a gas leak detector to check for gas leaks. Because gas leaks cannot always be identified by scent, expert assistance is strongly advised for this phase.
step 8: slide range into place
If there are no gas leaks, move the range into the cutout space with the assistance of another person. The appliance’s alignment should also be examined, and if necessary, corrected with the leveling feet on the bottom of the range.
how do I know if I can install a gas range?
You may be able to install a gas range on your own with the correct equipment and the assistance of another person. To guarantee a correct fit, thoroughly measure the dimensions of the appliance and your cutout space prior to installation.
You’ll also need to know if the range space is wired for gas to power the appliance. If a gas line needs to be installed, a professional must be contacted for assistance.
how long does it take to install a range?
Depending on the type of range being installed, it might take anywhere from two to six hours. Installation time for gas stoves can range from four to six hours, while installation time for electric stoves can range from one to two hours.
how far does a stove need to be from a wall?
In the absence of a blackguard, a stove or range should be situated at least 6 inches away from a flammable back wall surface, such as drywall. The range may normally be placed with no wall clearance when using a blackguard.
The exact distance between your range and the wall will depend on the type of range you have and its size. The owner’s instructions for your new range will tell you how much space you should leave between the range and the walls.
Conclusion
As you can see, installing a gas stove is not difficult. You may save money by doing it yourself at home. However, you should never do it if you do not have the necessary permissions and abilities in gas installation. Attempting to do the assignment without the necessary expertise carries a significant risk. For example, your installation will be vulnerable to multiple leaks. These leaks can start a fire, causing significant damage to your property. You also lack a safety manual for working with gaseous elements. You may disregard the concept of turning off the gas before starting your installations. So, if you don’t have the skills, always work with a gas fitter.
In a nutshell, gas is a dependable and cost-effective energy source. This is a recommended procedure when installing a new stove or gas appliance. Following the procedures outlined above will make your installation process smooth and free of problems.
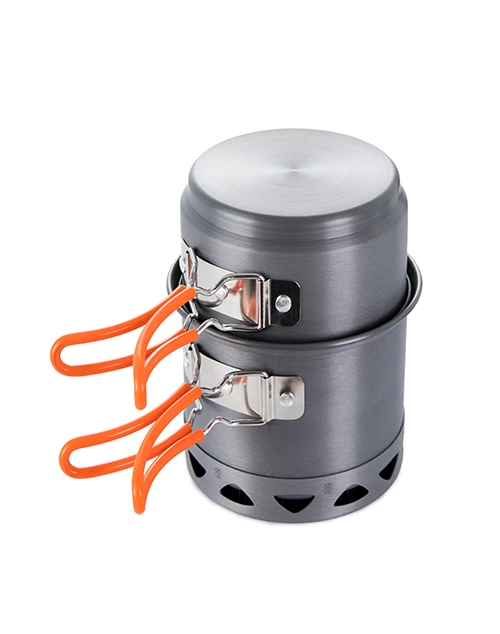
ODM service
Looking for reliable camping stove supplier? At Deermaple, we specialize in ODM service, offering high-quality and innovative stoves tailored to your needs.
If you are interested in camping stove wholesale , please contact us.