 You clean your gas stove frequently, but what about the burners? These components might become filthy over time, affecting their effectiveness. Learn how to properly clean your gas stove top burners, including the burner heads and caps. Review this step-by-step tutorial from Deermaple to clean your cooktop drip pans if spills overflow uncontrollably and cause residual food and oil to pile up under your burners.
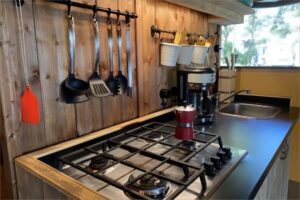
How does your gas burner work?
Gas burners accept an air-gas combination delivered by the main gas line. A gas valve is usually attached to a gas stove and distributes the air-gas mixture to each burner.
Older gas burners had a pilot light. However, modern gas burners have a little spark pilot positioned on each burner’s side. The burner is a tiny ceramic disk with holes through which the air-gas combination flows. When the spark or pilot is ignited, the gas ignites and flows through the holes in the burner. The airflow is then adjusted using a knob on the front of the stove, allowing you to produce more or less flame as desired.
How often should you clean a gas burner?
Once a year, you should clean your gas burner. When cleaning the inside of their oven, many people prefer to clean their burners as well. However, a good time to clean your burners is when you see the flame weakening. A faint flame indicates that the ports or burners are blocked and need to be cleaned.
The steps for cleaning a gas stove burner are outlined below. Take your time and consult your owner’s handbook if needed.
How to clean your gas stove burner?
STEP 1. REMOVE THE BURNER CAP AND BURNER BASE
Make sure the gas stove top is cold to the touch and the appliance is disconnected before removing the burner cap or burner base. Then simply remove the grates and take the burner top off. To remove the screws from some burner bases, you may need to use a screwdriver. Remove the screws if required, then gently raise the base and separate the cables. If your model has a standing pilot light, switch off the gas valve before removing any parts.
STEP 2. CLEAN THE BURNER CAP AND BASE
When cleaning the burner caps and base, use a non-abrasive plastic scouring pad and a mildly abrasive cleanser. To clean certain sections of your gas stove top, use the following tips:
- Clean the cooktop as soon as the surface, grates, and caps have cooled after cooking.
- Do not clean burner caps in the oven during a Self-Cleaning cycle.
- Do not wash burner caps in the dishwasher.
STEP 3. CLEAN THE GAS TUBE OPENING UNDER THE BASE
To reach the gas tubing, you may need to remove your stove surface. These tubes are situated under the burner base and connect to the gas valve.
Once identified, disconnect the tube from the base and use a straight pin, needle, or tiny gauge wire to clean any debris in the tube hole carefully. Take care not to damage the tube in the process.
Reattach the tube to the base and reinstall the cooktop surface after cleaning.
STEP 4. GENTLY CLEAN THE IGNITER WITH A DAMP CLOTH
The igniter is a tiny port beneath the burner’s base. Using a wet cloth, gently remove any debris from the igniter.
STEP 5. CLEAN CLOGGED BURNER PORTS
Clean blocked burner ports with a straight pin, needle, or small gauge wire. Avoid performing the following to clean the ports properly:
- Do not attempt to clean the dishwasher’s burner ports.
- Do not extend or deform the port in any way.
STEP 6. REINSTALL THE BURNER BASE AND CAP
Reattach the burner base with screws if it was previously connected. After you’ve secured the burner base, set the cap on top of it. Caps must be positioned on the base for the burner to properly ignite.
- Check that the alignment pins (if present) are properly adjusted with the burner cap and that the correct burner cap is installed on the correct burner base.
- The burner cap should be flush with the burner base and move very little from side to side.
STEP 7. TURN ON THE GAS STOVE BURNERS
Turn the stove knob on to activate the igniter after properly installing and aligning the base and cap. Check the cap alignment and whether the proper burner cap is on the correct burner base if the burner does not light.
Tips for how to clean gas stove burner caps
If your stove top caps are dusty or dingy, use the following cleaning methods:
IMPORTANT: Before cleaning, ensure that all controls are turned off and the stove is completely cold. Unless otherwise specified, soap, water, and a soft cloth or sponge are recommended first. If you prefer electric or induction versions, deermaple provides a broad selection of stoves to meet your specific requirements.
- Scrub the floor with a non-abrasive plastic cleaning pad and a minimally abrasive cleanser. When the stove, grates, and caps have cooled, clean them.
- Do not wipe the oven’s burner caps during a Self-Cleaning cycle.
- Clean up any food spills containing acids, such as vinegar and tomato, as soon as the stovetop, grates, and caps are cold. These spills may have an impact on the finish.
- Do not knock caps against one another or against hard surfaces, such as cast-iron cookware, to avoid chipping.
Best cleaners for gas stove burners
Vinegar and baking soda
Vinegar and baking soda are a tried-and-true cleaning duo that many households have on hand. You may make a fine paste out of one part baking soda and one part vinegar to help scrape away grit and filth. When working with burners that do not have caked-on grease, soaking them in simple white or apple cider vinegar will assist in removing lighter stains.
Dish soap
Many people who wish to clean their gas stove burners use dish soap. This is because of the suds’ ability to break down oil quickly, and dish soap is more straightforward to rinse off than the vinegar/baking soda mixture. While both are helpful, dish soap is an excellent option for individuals who want a simpler approach.
Conclusion
Cleaning your gas stove burners isn’t as difficult as it appears. Take your time and be thorough with the cleaning. Before drying, ensure your components are well-washed and clear of soap or dirt. If you see any discolouration, ensure sure your burners are turned on properly, are entirely dry, and have no soap remaining. If done correctly, you’ll be left with clean burners that are ready to fire up for your next meal.