 When you think of camping, you might imagine toasting marshmallows over a blazing fire or grilling hot dogs in the open air. But did you know you can use a camp stove to prepare wonderful treats? With a few basic techniques and tactics, you can improve your outdoor cooking skills and enjoy freshly baked treats in the great outdoors.
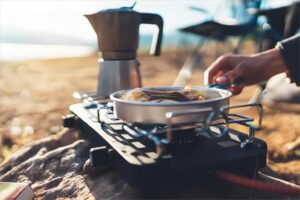
Choosing the Right Equipment
Before you begin baking on a camp stove, be sure you have the proper equipment. Here’s everything you’ll need:
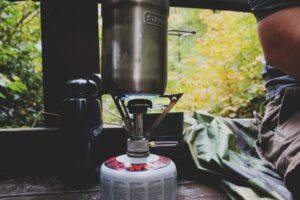
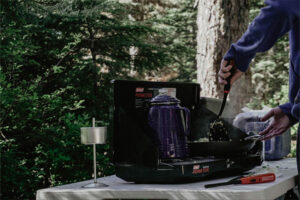
- Camp Stove:Look for a reliable and sturdy camp stove that can generate continuous heat for baking.
- Oven-Safe Cookware:Invest in a cast iron skillet, Dutch oven, or other oven-safe equipment that can handle high temperatures.
- Heat Source:If you’re using propane, butane, or another fuel source, make sure you have enough to get through the baking procedure.
- Oven Thermometer:Because camp stoves lack built-in temperature indicators, an oven thermometer can help you monitor the temperature inside your improvised oven.
Simple and Delicious Recipes
Now that you’ve gathered the essential supplies, it’s time to try some simple campfire baking recipes. Here are some suggestions to help you get started:
- Campfire Cinnamon Rolls:Use pre-made dough or prepare your own ahead of time. Roll the dough out, sprinkle with cinnamon and sugar, and then roll it back up. Put the rolls in an oiled pan and bake until golden brown. For an elegant finish, top with cream cheese frosting.
- Skillet Cornbread:Prepare a basic cornbread batter and pour it onto an oiled cast iron pan. Place the skillet on the camp stove and bake until the cornbread is crisp and brown around the edges.
- Dutch Oven Apple Crisp:Toss sliced apples in sugar and cinnamon, then top with oats, flour, and butter. Place the Dutch oven on the camp stove and bake until the apples are soft and the topping is crispy.
5 Incredibly Useful Backcountry Baking Techniques
- “Tower of Power”
Turn on your stove and put it to low to medium heat. Bend the stove’s windscreen into a circle to place your pan on. (*Make sure to fold the edges together several times to keep the tower from falling apart while cooking!) set the windscreen around your stove as usual, then set your baking pan on top of the tower to cook. To achieve consistent cooking, utilize the “round the clock” approach, which involves rotating the pan around the center of the burner.
- “Twiggy Fire”
Turn your stove to low heat. Place your covered baking pan on top and start a tiny fire on top of the lid. Your lid must be flat and free of all plastic pieces. Use the same amount of caution as you would with any fire, and be aware of any local fire rules.
For this approach and the tower of power, you may lessen your stove’s heat by depressurizing. This needs to be done extremely carefully. To depressurize, start your stove as usual and let it heat up. Then, switch it off and blow out the flame until it is entirely gone. Slowly unscrew the connector to the gasoline bottle until you hear the hiss of pressure being released from the bottle. After 2-3 seconds, fully reconnect the cap, pump twice, and relight the stove. The resulting flame will be wavering and low. If it appears that it may fail, pump the gasoline container once or twice.
- Steam Baking
Steam baking is popular among people who only carry one pot or who use canisters or other lightweight stoves that cannot be depressurized.
Use silicone or foil baking cups to divide your batter or dough. Take a piece of aluminum foil and wrap it up to form a coil. Place the coil at the bottom of a pot or pan.
Fill the pan with an inch or two of water, then add the batter-filled baking cups (making sure the water does not spill over the sides), and set the covered pot on the heat. While cooking, make sure there is always water in the bottom of the pot and add more as needed.
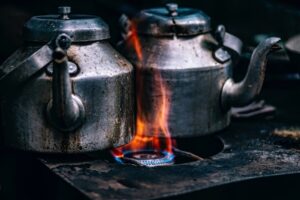
- Dutch Oven Style (Baking on a Fire)
If you have a campfire, you can utilize the hot coals to cook! Spread the coals from your fire into a uniform layer. They should feel extremely scorching, but not so hot that you can’t hold your hand six inches away for many seconds.
Place the pan on the coals and add more (the coals on top should be hotter than the ones on the bottom). As the coals cool, replace them with hot coals from the fire.
Tips for Successful Campfire Baking
Baking on a camp stove differs from baking in a conventional oven, but with the appropriate method, you may obtain excellent results. Here are some suggestions to help you perfect the art of campfire baking:
- Monitor the Heat:Because camp stoves can have hot zones, rotating your cookware frequently ensures uniform baking.
- Use the Lid:When baking in a Dutch oven, laying the lid on top of the embers creates a temporary oven, enabling heat to flow around the dish.
- Be Patient:Baking on a camp stove may take longer than in a regular oven, so be prepared to be patient while your delectable creations gradually come to life.
- Experiment:Experiment with new recipes and approaches. The goal of campfire baking is to embrace the experience and enjoy the process.
Conclusion
Baking on a camp stove gives up new gastronomic options for outdoor camping. With the correct tools, basic recipes, and a sense of adventure, you may experience the pleasures of freshly baked foods while immersed in the beauty of nature. So, the next time you go camping, try campfire baking. It’s a delightful experience waiting to be explored!